Django is a free, open source web framework written in the Python language.
A web framework is a software framework that provide a standard way to build web applications. It allows web developers to focus on developing the business requirements rather than reinventing the wheel every time for standard, secure web applications.
In this post we will create a django project and host it in IIS.
It is best practice to provide a dedicated environment for each Django project you create, it allows you to run different versions of django for different applications
on the same machine. There are many options to manage environments within the Python ecosystem, we will use the Python's default package venv for managing environments.
Create django project
Following are the steps you need to create a django project.
-
To create a virtual environment for your project, open a new command prompt, navigate to the folder where you want to create your project and then run the following command:
python -m venv myproject_env
In this exmaple, I have executed this command at
c:\projects. Above command will create a virtual environment and you will see a new folder namedmyproject_envat the path where you executed this command. -
Next, we need to activate the environment, run this command from the command prompt(from same path).
.\myproject_env\Scripts\activate
We have setup our virtual envrionemnt.
-
Lets create a new directory named
src.mkdir src
We have
srcfolder atc:\projects. -
Move to
srcfoldercd src
-
and install
djangoby using this command.pip install DjangoThis will install the latest release of django.
-
Create a new django project (from command prompt at src folder),
django-admin startproject myproject
-
Execute
manage.py runservercommand, it will start the django site with development server athttp://127.0.0.1:8000/python manage.py runserver
-
Enter this url in browser and you will see django's default page rendered successfully.

Install and enable wfastcgi
wfastcgi.py provides a bridge between IIS and Python using WSGI and FastCGI. It can be used with any Python web application or framework that supports WSGI.
-
Run the following command to install
wfastcgipip install wfastcgi
-
After installing
wfastcgi, we need to enable it using:wfastcgi-enable
Note that, you need to open command prompt will elevated privilege.
If the above command is executed successfully, it will display the output similar to this:
Applied configuration changes to section "system.webServer/fastCgi"
    for "MACHINE/WEBROOT/APPHOST"
    at configuration commit path "MACHINE/WEBROOT/APPHOST"
Host django site in IIS
We have a working django site. Following are the steps we need to configure to make django work under IIS.
-
Copy the project's folder(the folder which contains the actuall source code, in our case myproject folder located at
c:\projects\src) in wwwroot. -
Create a new website in
IISwith namemyproject.
In our exmaple we are using
port 82for new website. -
Open
Hanlder Mappingssection.
-
Click on
Add Module Mappinglink on the right side:
-
In
Add Module Mappingdialog box, enter*forRequest Path.
-
From
Moduledropdown, selectFastCgiModule. -
In
Executabletextbox, enter the following path to python.exe and wfastcgi.py separated by|sign. In our case the path is:"c:\projects\myproject_env\scripts\python.exe | c:\projects\myproject_env\lib\site-packages\wfastcgi.py"You need to change the path as per your environment.
-
Enter any desired name in
Namefield, in our case, it isDjango Hanlder. -
Click the
Request Restrictionsbutton, it will open the following dialog.
-
Uncheck the checkbox
Invoke handler only if request is mapped to: -
Then click
OKon both dialog boxes. -
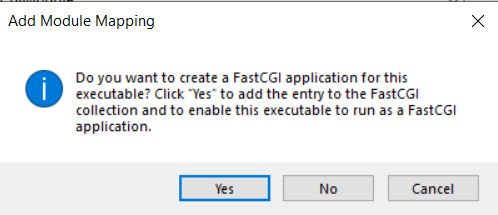
It will ask you to create a
FastCGIapplication.
Click
Yes. -
It creates a
web.configfile in the project's root folder which we have copied in wwwroot(C:\inetpub\wwwroot\myproject). Open theweb.configfile and update the content as below:<?xml version="1.0" encoding="UTF-8"?> <configuration> <system.webServer> <handlers> <add name="Django Handler" path="*" verb="*" modules="FastCgiModule" scriptProcessor="c:\projects\myproject_env\scripts\python.exe | c:\projects\myproject_env\lib\site-packages\wfastcgi.py" resourceType="Unspecified" /> </handlers> </system.webServer> <appSettings> <add key="WSGI_HANDLER" value="myproject.wsgi.application" /> <add key="PYTHONPATH" value="C:\inetpub\wwwroot\myproject" /> <add key="DJANGO_SETTINGS_MODULE" value="myproject.settings" /> </appSettings> </configuration>Make sure to change the project name and path as per your settings.


That's it. We have setup the django site in IIS. Navigate the follwoing link in browser:
http://localhost:82/
You can change the port number if you have configured a different one when creating website in IIS.
And you will see the django default page.

If you get any error, check if you have given the proper rights on the project folder to DefaultAppPool.

No comments:
Post a Comment