This post will show you how to add ASP.Net Identity support in ASP.Net Webforms application. So it will allow you to enable authentication mechasnism for web requests.
I am using Visual Studio 2017 for this example. Lets create a new website with ASP.NET Web Application (.Net Framework) project template, in the next dialog box select the Empty template, it will make the Change Authentication button disabled.

In this example we will use the default implementation of IdentityUser, UserStore and UserManager classes which comes with EntityFramework package. So we have to install the following packages
for this example:
Microsoft.AspNet.Identity.EntityFramework
Microsoft.AspNet.Identity.OwinMicrosoft.Owin.Host.SystemWeb

Add new Web Form named Register with the following content inside the form tag.
 <div style="margin-left:50px;">
  <asp:PlaceHolder runat="server" ID="phRegisterForm">

   <h4>Register</h4>
   <p>Please fill in this form to create an account.</p>
   <hr />
   <p>
    <asp:Label runat="server" ID="lblMsg" />
   </p>

   <label for="email"><b>User Name</b></label>
   <div>
    <asp:TextBox runat="server" ID="UserName" />
   </div>
   <br />
   <label for="psw"><b>Password</b></label>
   <div>
    <asp:TextBox runat="server" ID="Password" TextMode="Password" />
   </div>
   <br />

   <label for="psw-repeat"><b>Repeat Password</b></label>
   <div>
    <asp:TextBox runat="server" ID="ConfirmPassword" TextMode="Password" />
   </div>
   <hr/>

   <asp:Button runat="server" OnClick="CreateUser_Click" Text="Register" />
  </asp:PlaceHolder>
 </div>
In the Register.aspx.cs file, add following code for CreateUser_Click event handler
(copied from Microsoft Docs)
protected void CreateUser_Click(object sender, EventArgs e)
      {
         // Default UserStore constructor uses the default connection string named: DefaultConnection
         var userStore = new UserStore();
         var manager = new UserManager(userStore);

         var user = new IdentityUser() { UserName = UserName.Text };
         IdentityResult result = manager.Create(user, Password.Text);

         if (result.Succeeded)
         {
            StatusMessage.Text = string.Format("User {0} was created successfully!", user.UserName);
         }
         else
         {
            lblMsg.Text = result.Errors.FirstOrDefault();
         }
      }
We have setup the Register page markup for user creation. Lets add the database which EntityFramework will use to store user identity data.
First create App_Data folder. Then add for the following connection string tag in web.config file.
  <connectionStrings>
    <add name="DefaultConnection" connectionString="Data Source=(localdb)\MSSQLLocalDB;AttachDbFilename=|DataDirectory|\WebFormsIdentity.mdf;Initial Catalog=WebFormsIdentity;Integrated Security=True" providerName="System.Data.SqlClient" />
   </connectionStrings>
Since we have used default UserStore constructor, it needs the default connection string named DefaultConnection.
Note that we have only specified the connection string for database WebFormsIdentity.mdf in App_Data folder, but we did not yet created that. The database will be created at runtime by EntityFramework for the Identity entities.
Now you can run the project with start page of Register.aspx, enter user name and password. It will give you the success message.

We have completed the support for creating new users. Lets move to the next part, how to add authentication to login a user. We will use OWIN authentication for which we already have installed
the packages Microsoft.AspNet.Identity.Owin and Microsoft.Owin.Host.SystemWeb.
From Microsoft Docs:
ASP.NET Identity uses Microsoft OWIN Authentication middleware for forms authentication. The OWIN Cookie Authentication is a cookie and claims based authentication mechanism that can be used by any framework hosted on OWIN or IIS. TheMicrosoft.Aspnet.Identity.Owinpackage contains a set of OWIN extension classes to manage and configure OWIN authentication middleware to be consumed by ASP.NET Identity Core packages.The Microsoft.Owin.Host.SystemWebpackage contains an OWIN server that enables OWIN-based applications to run on IIS using the ASP.NET request pipeline. For more information see OWIN Middleware in the IIS integrated pipeline.
First we have to add OWIN startup and authentication configuration.
Right click on the project and click Add New Item, from the item dialog box, select OWIN Startup class, put the name Startup. Replace the content of this file with the following:
 using Microsoft.AspNet.Identity;
 using Microsoft.Owin;
 using Microsoft.Owin.Security.Cookies;
 using Owin;

 [assembly: OwinStartup(typeof(WebFormsIdentity.Startup))]

 namespace WebFormsIdentity // change to your project's namespace
 {
    public class Startup
    {
    public void Configuration(IAppBuilder app)
    {
    // For more information on how to configure your application, visit http://go.microsoft.com/fwlink/?LinkID=316888
    app.UseCookieAuthentication(new CookieAuthenticationOptions
    {
    AuthenticationType = DefaultAuthenticationTypes.ApplicationCookie,
    LoginPath = new PathString("/Login")
    });
    }
    }
 }
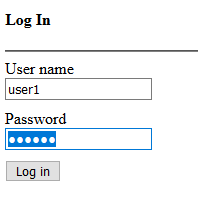
Add new Web Form and name it Login, and replace the html content with the following inside form tag.
 <div>
  <h4>Log In</h4>
  <hr />
  <asp:PlaceHolder runat="server" ID="phLoginStatus" Visible="false">
   <p>
    <asp:Label runat="server" ID="lblStatus" />
   </p>
  </asp:PlaceHolder>
  <asp:PlaceHolder runat="server" ID="phLoginForm" Visible="false">
   <label><b>User Name</b></label>
   <div>
    <asp:TextBox runat="server" ID="UserName" />
   </div>
   <br />

   <label><b>Password</b></label>
   <div>
    <asp:TextBox runat="server" ID="Password" TextMode="Password" />
   </div>
   <br />
   <div>
    <asp:Button runat="server" OnClick="SignIn_Click" Text="Log in" />
   </div>
  </asp:PlaceHolder>
  <asp:PlaceHolder runat="server" ID="phLogoutButton" Visible="false">
   <div>
    <div>
     <asp:Button runat="server" OnClick="SingOut_Click" Text="Log out" />
    </div>
   </div>
  </asp:PlaceHolder>
 </div>
Replace the Login.asps.cs file content with the following:
using Microsoft.AspNet.Identity;
using Microsoft.AspNet.Identity.EntityFramework;
using Microsoft.Owin.Security;
using System;
using System.Web;
using System.Web.UI.WebControls;

namespace WebFormsIdentity // change to your project's namespace
{
    public partial class Login2 : System.Web.UI.Page
    {
        protected void Page_Load(object sender, EventArgs e)
        {
            if (!IsPostBack)
            {
                if (User.Identity.IsAuthenticated)
                {
                    lblStatus.Text = string.Format("Hello {0}!!", User.Identity.GetUserName());
                    phLoginStatus.Visible = true;
                    phLogoutButton.Visible = true;
                }
                else
                {
                    phLoginForm.Visible = true;
                }
            }
        }

        protected void SignIn_Click(object sender, EventArgs e)
        {
            var userStore = new UserStore();
            var userManager = new UserManager(userStore);
            var user = userManager.Find(UserName.Text, Password.Text);

            if (user != null)
            {
                var authenticationManager = HttpContext.Current.GetOwinContext().Authentication;
                var userIdentity = userManager.CreateIdentity(user, DefaultAuthenticationTypes.ApplicationCookie);

                authenticationManager.SignIn(new AuthenticationProperties() { IsPersistent = false }, userIdentity);
                Response.Redirect("~/Login.aspx");
            }
            else
            {
                lblStatus.Text = "Invalid username or password.";
                phLoginStatus.Visible = true;
            }
        }

        protected void SingOut_Click(object sender, EventArgs e)
        {
            var authenticationManager = HttpContext.Current.GetOwinContext().Authentication;
            authenticationManager.SignOut();
            Response.Redirect("~/Login.aspx");
        }
    }
}
In the Page_Load we can check for the status of current user and take action based on its User.Identity.IsAuthenticated property.
Now run the website with Login.aspx set as Start Page. Try login with you user created from Register page. It will give you success and
failed response messages based on the credentials you enter.
No comments:
Post a Comment